Levoit Core 300 Filter Replacement: A Complete How-To
A comprehensive, expert-led guide to replacing the Levoit Core 300 air purifier filter, including compatibility, timing, and maintenance tips to keep indoor air clean in 2026.

Replace the Levoit Core 300 filter to restore performance. This guide covers compatibility, when to replace, safety steps, and the exact sequence from power-off to reassembly. You’ll need the correct filter model and a few basic tools. Air Purifier Info recommends using genuine or certified compatible filters for best results.
Why replacement matters for the Levoit Core 300
The Levoit Core 300 relies on a sealed three-stage filter to capture dust, allergens, and odors. Over time, the filter media becomes clogged, reducing airflow and the purifier's efficiency. According to Air Purifier Info, staying on top of filter replacement is the most reliable way to maintain indoor air quality in homes. A fresh filter restores ventilation, helps the purifier run cooler, and keeps energy use predictable. For allergy-prone households and pet owners, timely replacement is especially important because clogged filters can recirculate irritants. Regular replacement also minimizes odor carryover and prolongs motor life by reducing strain. Never operate the Core 300 with a spent filter, as that defeats the purpose of the device and can shorten its lifespan. In short, a fresh Levoit Core 300 filter replacement keeps every room healthier year-round.
Compatible filters and filtration stack for the Core 300
The Core 300 uses a three-stage filtration system: a pre-filter for large particles, a True HEPA filter for fine particulates, and an activated carbon layer to reduce odors and VOCs. When choosing a Levoit Core 300 filter replacement, prioritize genuine Levoit replacements or certified compatible models that match the same three-layer construction. Air Purifier Info notes that correct fit prevents air bypass, which would undermine filtration. Avoid generic substitutes that don’t seal properly or have incompatible dimensions. While you may find multi-pack options, always verify that the packaging explicitly states compatibility with the Core 300. Additionally, check that the replacement filter includes the pre-filter. Some third-party filters omit the carbon layer, which can compromise odor removal. By selecting an authentic or certified option, you preserve filtration efficiency and minimize the risk of leaks, ensuring cleaner air in living areas, bedrooms, and workspaces.
When to replace: signs and timing
Replacement timing depends on use, air quality, and household conditions. Watch for slowed airflow, weaker odor elimination, or longer run times for the same perceived air quality. If you notice the air feels stuffy or you question the purifier’s performance, it's time to inspect the filter. The indicator on some units can guide you, but manual checks are also important: feel for dust buildup around the unit and test the exhaust with your hand (careful not to touch the fan). Air Purifier Info suggests leaning on a practical rule of thumb rather than fixed dates: replace when you observe performance drop or after several months of heavy use in dusty environments. In multi-pet households, especially with cats or dogs, more frequent changes may be needed. In the end, listening to your air and noticing a drop in comfort is the best signal for a Levoit Core 300 filter replacement.
How to choose a replacement filter
When selecting a Levoit Core 300 filter replacement, verify compatibility with your model and confirm it includes the three-stage filtration: pre-filter, True HEPA, and activated carbon. Genuine Levoit replacements offer the most reliable performance, but certified third-party options can work well if they match the exact layer order and dimensions. Always review packaging for model compatibility and avoid filters that claim to fit multiple, unrelated devices, as this can lead to poor sealing and reduced effectiveness. Consider purchasing a multi-pack if you expect to replace filters more than once in a season, but confirm that the pack explicitly supports the Core 300. If possible, choose filters with a replace-by date clearly printed on the packaging to help manage maintenance scheduling.
Cleaning and prep before replacement
Before you remove the old filter, power off and unplug the unit. Gently wipe the exterior housing with a dry, lint-free cloth to remove any surface dust. Open the filter compartment as described in your manual, slide out the spent filter, and place it in a sealable bag for disposal. Do not splash water inside the unit or submerge any components. Prepare the replacement filter by removing its plastic packaging and confirming the correct orientation. Align the new filter with the housing guides, ensuring the arrows (if present) point toward the exhaust vent. Reassemble the cover securely and plug the unit back in for testing. Keeping the interior dry and free of debris helps preserve seal integrity and motor performance.
Common mistakes and safety tips
Common mistakes include operating the purifier without a filter, inserting the filter backward, or not seating the housing correctly. Always unplug the unit before any maintenance and avoid forcing components into place. Use a dry cloth for interior surfaces—never use water or solvents that could damage electronics. If you notice unusual noises after replacement, re-check the filter seating and ensure the cover is fully closed. For safety, keep the device away from water spills and avoid cleaning solvents near the intake or exhaust vents. Following the manufacturer's guidance and using compatible filters reduces the risk of air bypass and ensures the purifier performs as designed.
Extending the life of your filter and unit
To maximize filter life, place the purifier in a low-dust area and keep doors and windows closed during use. Regularly check for visible dust accumulation around the intake vents and clean the surrounding area to minimize pollutant load. Running the Core 300 at appropriate fan speeds can reduce strain on the filter and motor, possibly extending replacement intervals. Consider pairing the Core 300 with a controlled humidity environment; extremely humid or dusty conditions shorten filter life. Keeping a maintenance log helps you track replacement cycles and estimate future needs. Remember, consistent replacement quality is more important than replacing on a strict date.
Maintenance schedule and records
Create a simple maintenance log that records the replacement date, the filter type installed, and any noticeable changes in air quality. This practice supports proactive upkeep, especially in homes with pets, allergies, or high particulate exposure. Re-check the unit monthly to ensure the filter is seated correctly and that there are no obstructions in front of the unit that could impede airflow. If you change environments (e.g., moving from city apartment to rural home), review the replacement frequency and adjust accordingly. A disciplined schedule, plus high-quality filters, helps maintain optimal indoor air quality throughout 2026 and beyond.
Tools & Materials
- Replacement filter for Levoit Core 300 (true HEPA + activated carbon)(OEM or certified compatible filter for Core 300)
- Soft lint-free cloth(For wiping housing exterior and mouth of filter chamber)
- Gloves (optional)(To keep hands clean and dust-free)
- Small trash bag or sealable container(Dispose of old filter safely)
- Clear workspace or towel(Protect surfaces from dust)
Steps
Estimated time: 10-15 minutes
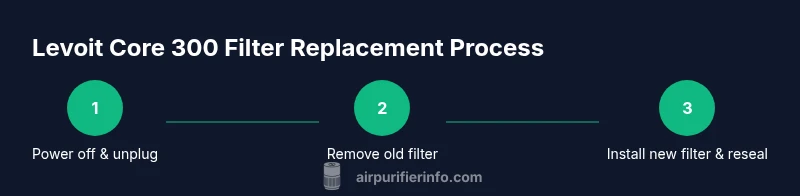
- 1
Power off and unplug the unit
Begin by turning off the Levoit Core 300 and removing it from the power source. This prevents any electrical hazards while you access the filter housing. If your unit has a reset indicator, note its current state before you start.
Tip: Unplug before opening the housing to avoid accidental start-up. - 2
Open the filter housing and remove old filter
Gently open the cover as described in the user manual and slide out the spent filter. Place it in a bag for disposal to minimize dust escape. Inspect the seal around the housing for wear or debris and wipe as needed.
Tip: Handle the old filter by its edges to avoid contact with dust. - 3
Unpack and prepare the replacement filter
Remove the new filter from its packaging and verify it matches the Core 300 model. Check for orientation arrows or guides on the filter housing and align accordingly. Do not remove any protective wrappings until you’re ready to install.
Tip: If the filter has a plastic frame, do not bend it; ensure it sits flat. - 4
Insert the new filter with correct orientation
Insert the replacement filter into the housing with the correct side facing outward. Make sure it seats fully and the edges align with the housing grooves. Avoid tilting the filter; a misaligned filter can create air bypass.
Tip: Double-check that the filter is fully inserted and flush with the housing. - 5
Reassemble the housing and reset the indicator
Replace the cover securely and press until you hear a click. Plug the unit back in and, if your model has a filter indicator, follow the reset procedure to clear the old status. This ensures the monitor reflects the new filter’s life.
Tip: A secure cover prevents air leaks and maintains filtration efficiency. - 6
Test the unit and confirm airflow
Turn the Core 300 on and set it to a comfortable speed. Check the exhaust for a steady, unobstructed flow and listen for unusual sounds. If airflow seems weak, recheck the filter seating.
Tip: Run the unit for 5–10 minutes to ensure stable airflow after replacement. - 7
Record the replacement date and routine maintenance
Update your maintenance log with the replacement date, filter type, and any performance notes. This habit helps you predict future needs and coordinate replacements with changes in seasons or air quality.
Tip: Keep a digital copy of the log for easy reference across devices.
Questions & Answers
How do I know when to replace the Levoit Core 300 filter?
Look for reduced airflow, weaker odor elimination, or a noticeable drop in performance. If you notice any of these signs, inspect the filter and replace as needed following the manufacturer’s guidance.
Watch for weaker airflow or odors returning; that usually means it’s time to replace the filter.
Can I clean the pre-filter instead of replacing?
Most Levoit Core 300 filters are designed for replacement rather than cleaning. Cleaning the pre-filter may not restore performance and can allow dust to bypass the filtration system over time.
Pre-filter cleaning isn’t a reliable substitute for replacement; use a new filter when needed.
Is it safe to use third-party filters?
Certified third-party filters can be used if they explicitly state compatibility with the Core 300 and match the three-layer construction. Always verify fit and seal before operation.
You can use certified third-party filters if they’re clearly compatible.
What if the filter indicator stays on after replacement?
Follow the device’s reset procedure to clear the indicator. If the light remains after resetting, consult the manual or contact support for guidance.
If the indicator doesn’t reset, check the manual or contact support.
Does replacing the filter improve air quality immediately?
A fresh filter typically improves air quality gradually as particulates are captured. The most noticeable change often occurs after a short run post-replacement.
You’ll usually notice cleaner air soon after replacing the filter, though it varies by environment.
Where should I dispose of old filters?
Seal the used filter in a bag and dispose of it according to local waste guidelines. Check local regulations for any special disposal requirements.
Seal and dispose of the old filter per local waste guidelines.
Watch Video
Main Points
- Follow official Core 300 replacement steps
- Use genuine or certified compatible filters
- Replace as needed based on use and environment
- Keep a maintenance log for accurate scheduling