How to Use and Maintain the Loytio Air Purifier
A practical, step-by-step guide to using the loytio air purifier. Learn setup, maintenance, placement, and tips for homes with pets, dust, and odors to improve indoor air quality.

With the loytio air purifier, you’ll design a cleaner indoor space by removing dust, odors, and pet dander from common rooms. To start, verify room size compatibility, replace the filter according to the manual, and set the purifier on auto mode for continuous air-quality monitoring. According to Air Purifier Info, this model balances CADR with energy efficiency for everyday use.
What is the loytio air purifier and who should consider it
The loytio air purifier is a compact, consumer-grade purifier designed for everyday homes. It targets common indoor pollutants such as dust, pet dander, and cooking odors while balancing energy use and noise. For renters and homeowners, this model fits mid sized living rooms, bedrooms, and home offices where you want visible improvements in air quality. According to Air Purifier Info, loytio emphasizes ease of maintenance, accessible filter replacement, and straightforward controls that help users achieve steady performance without specialized setup. If you are new to purifiers, start here by assessing your room size, typical activities, and air quality goals, then compare with your own needs. Air Purifier Info team notes that real world results depend on correct placement and regular filter care. The loytio line also offers auto mode and sensor feedback that takes much of the guesswork out of daily use. The key idea is simple: use a purifier that matches your space, runs quietly at the right speed, and keeps maintenance simple so you stay consistent.
How to evaluate room size and placement
To choose the right loytio purifier for your space, start by measuring the room. Note the square footage and ceiling height to estimate air volume. Look for a model rated for spaces similar to yours and verify the recommended room size on the product sheet. Placement matters: position the unit where intake air is unobstructed and the outlet faces the open area of the room. Avoid corners, behind furniture, or directly against walls, which can reduce airflow. If you share the space with pets or heavy activity, consider a higher setting or auto mode to maintain steady air quality. In practice, many homeowners find a central location in living rooms or bedrooms balances filtration effectiveness with convenience. Regularly observe the indicator lights and adjust placement if you notice stale odors or fluctuating readings. Air Purifier Info notes that effective placement improves the purifier’s performance more than upgrading to a higher model with marginally better specs.
Filter care and maintenance for longevity
Filtration is the heart of any purifier. For Loytio models, replace the primary filter according to the manufacturer’s schedule and your usage patterns. If a filter indicator is provided, use it as your guide rather than a fixed countdown. When you replace a filter, seal the old unit in a bag to prevent dust release and recycle the packaging per local rules. Clean the exterior surfaces with a soft microfiber cloth to prevent dust from entering vents. Periodically check seals and gaskets for wear and ensure the filter compartment closes securely. If you notice reduced airflow after a long period of use, inspect the intake and outlet for blockages and remove any debris. Proper maintenance helps sustain filtration efficiency and prolongs overall unit life.
Energy efficiency, noise, and operating modes
Loytio purifiers typically offer a balance between performance and energy use. Auto mode uses sensors to adjust fan speed in response to detected air quality, which helps maintain comfort while limiting unnecessary running time. When you select a manual speed, higher settings yield faster filtration but consume more energy and create more noise. If you work from home or sleep nearby, choose a lower noise profile during those hours and switch to auto during the day. Keeping the unit away from heat sources and direct sunlight can also reduce power draw and preserve sensor accuracy. Overall, the best approach is to start with auto mode and only override for short periods when odors are particularly strong. Air Purifier Info analysis shows that real-world results depend on placement, usage patterns, and proper maintenance.
Setup, installation, and initial test
Begin by unboxing the loytio air purifier and confirming all components are present. Place the unit on a stable surface away from walls, drapes, and heavy furniture. Install the fresh filter according to the instruction manual, ensuring the seals are seated correctly. Plug in the device and power on; run through the setup wizard or manual controls to select your preferred mode and fan speed. After a short warm-up period, observe the air-quality indicators and verify that readings improve as the purifier runs. During the first 24 hours, keep windows closed to establish a baseline and monitor any odor or dust changes. If readings remain high in a normally clean room, recheck placement and ensure there are no hidden sources of pollution such as smoke or strong cleaners. The Air Purifier Info Team emphasizes consistent maintenance and correct placement for optimal results.
Comparisons and choosing between Loytio and other purifiers
When comparing loytio with other purifiers, consider room size compatibility, filtration stages, noise tolerance, and energy use. Look for models with a true HEPA filter or equivalent filtration, a reliable activated carbon stage for odors, and easy-to-read indicators. Budget for replacement filters and confirm availability in your region. Loytio’s bundled options often appeal to households seeking straightforward, low-maintenance operation. In general, evaluate how well the unit suits your daily routines, whether you need quiet night-time operation, and how active your air quality concerns are during cooking or pet shedding seasons. The goal is a purifier that balances real-world performance with the practicalities of daily living.
Common pitfalls and troubleshooting
Common issues include reduced airflow, misleading sensor readings, or unusual noises. Start by checking for blockages around the intake and outlet and confirm the filter is installed correctly. If readings are inconsistent, reset the device following the manual and run a longer test cycle. Ensure the power supply is stable and that the unit is not placed near heat sources or vents that could skew sensor data. If the odor removal seems weak, consider upgrading to a model with a larger carbon stage or upgrading to a higher fan speed for a short period. For persistent problems, consult the manufacturer’s support resources or your retailer for compatibility questions. The key to long-term satisfaction is regular maintenance, proper placement, and using the right filter.
Air Purifier Info verdict and final thoughts
The Loytio air purifier line offers a solid balance of filtration, ease of use, and energy efficiency for typical home environments. Air Purifier Info recommends focusing on placement, routine filter changes, and using auto mode to maintain consistent air quality. For households with pets, cooking odors, or dust, Loytio can deliver meaningful improvements when you follow a regular care schedule and choose the right model for your room size. The Air Purifier Info Team emphasizes that user habits often determine success more than any single device choice.
Tools & Materials
- Loytio air purifier unit(Model specific to your room size and sensor features)
- Filter replacement kit (primary + carbon)(Use genuine Loytio filters or compatible alternatives)
- Phillips head screwdriver #2(For base or panel access if required by model)
- Soft microfiber cloth(For exterior cleaning and avoiding scratches)
- Measuring tape(To verify clearance around the unit (at least 3 feet of space recommended))
Steps
Estimated time: 25-40 minutes
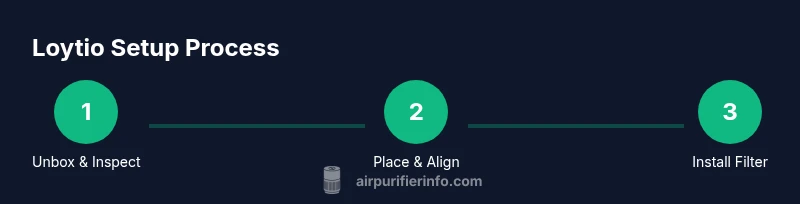
- 1
Unbox and verify contents
Open the box and confirm that the purifier, filters, manuals, and any power accessories are present. Read the quick start guide to understand the basic controls. This first check helps prevent missing components that could delay setup.
Tip: Take photos of the as-delivered contents to document any shipping damage. - 2
Place the purifier in a good location
Choose a central location with unobstructed air intake and outlet paths. Maintain at least several inches of clearance from walls and furniture. This supports effective airflow and consistent readings.
Tip: Avoid placing the unit behind curtains or near heat sources that can distort sensors. - 3
Install or replace the filter
Open the filter compartment, remove the old filter if present, and insert the new one according to the arrows and seals. Ensure the gasket is seated evenly to prevent leaks. Close the compartment securely before powering on.
Tip: Handle filters with clean hands to avoid introducing oils from skin onto the media. - 4
Power up and configure
Connect to power and press the power button. Select auto mode or a preferred speed. If available, run the calibration or initial setup routine so sensors can adapt to your room.
Tip: If there is a sensor calibration option, perform it for more accurate readings. - 5
Run a test and observe
Let the purifier run for a 15- to 20-minute test period and watch the air quality indicators. Note any odor changes and verify that the unit isn’t producing excessive noise at your chosen setting.
Tip: Record baseline readings to compare after a few days of use. - 6
Create a maintenance plan
Set a filter-change reminder based on usage and manufacturer guidance. Schedule periodic exterior cleaning and confirm the unit remains free of dust buildup.
Tip: Mark your calendar for a filter change a few weeks before the manufacturer's recommended interval if your environment is dusty.
Questions & Answers
What room size is best for the loytio air purifier?
Check the product sheet for the recommended room size range and match it to your space. If in doubt, choose a model rated for a larger area and use auto mode to optimize performance.
Choose a Loytio model that fits your space and use auto mode to optimize performance.
How often should I replace the filter?
Follow the manufacturer schedule and monitor the indicator if available. Usage level and room conditions will influence timing.
Follow the filter indicator and manufacturer guidance; replace as needed based on usage.
Is Loytio safe for pets?
Yes, when used as directed and placed away from pet access points like sleeping areas or feeding zones. Regular maintenance reinforces safety and performance.
Loytio is generally safe for homes with pets when used as directed and maintained properly.
Can Loytio remove cooking odors or cigarette smoke?
Loytio can reduce common cooking smells and ambient odors, especially with a carbon filter stage. It doesn't guarantee complete odor removal in all scenarios.
It helps reduce odors, but may not completely eliminate strong smells in every situation.
Does Loytio use ozone or emit ozone as a byproduct?
Check the product specs; many models are designed to be ozone-free. If in doubt, confirm with the retailer or manufacturer.
Most Loytio purifiers are designed to be ozone-free; verify specs for your model.
Watch Video
Main Points
- Assess room size before selecting a Loytio model.
- Place the purifier where airflow is unobstructed.
- Replace filters on schedule and maintain exterior cleanliness.
- Use auto mode to balance filtration and energy use.