Bathroom Air Purifiers: The Comprehensive 2026 Guide to Cleaner Indoor Air Quality
Learn how to choose, place, and maintain a bathroom air purifier to cut odors, dust, and mold in small spaces with practical filtration and upkeep tips.

Discover how to choose and use a bathroom air purifier that actually improves air quality in small spaces. You’ll learn how to size by square footage, pick essential features like humidity tolerance and activated carbon filtration, compare HEPA and carbon-only units, and establish a simple maintenance routine to keep odors, dust, and mold at bay.
Why a bathroom air purifier matters
In many households, bathrooms are among the most challenging rooms for air quality due to humidity, steam, and frequent moisture. A dedicated bathroom air purifier targets the pollutants that linger in these moisture-rich spaces: fine particles from skin cells and dust, mold spores in damp corners, and odors from showers, cleaning products, and toiletries. Even with a vent fan, moisture can persist and odors can linger, especially in smaller bathrooms or poorly circulated apartments. An effective purifier can quickly capture these contaminants, helping mirrors stop fogging and odors dissipate more quickly between uses. According to Air Purifier Info, many households underestimate how quickly moisture and scent molecules accumulate in compact bathrooms, leading to stale air. By choosing a unit designed for bathrooms, you add a layer of defense that works continuously, not just when you remember to run the fan. For renters, a compact, quiet model on a vanity or shelf can be a simple upgrade that doesn’t require permanent installation and can be moved if you change bathrooms.
How bathroom air purifiers work
Most bathroom purifiers combine filtration stages to target different pollutants. A true HEPA filter traps tiny particles such as pollen, dust, and dander. An activated carbon filter absorbs odors from cleaning products, bathroom spray, and mold-related scents. Some units include a humidity-tolerant motor and a sealed housing to resist moisture, which is essential in damp environments. Many models also offer a compact pre-filter or washable screens that extend the main filter’s life. When shopping, look for a unit described as ozone-free and with a design that minimizes water exposure to electrical components. While not all purifiers remove humidity, some have auto modes that adjust fan speed in response to rising humidity, helping the room feel less damp. For best results, choose a unit that is appropriately sized for the bathroom’s volume and air exchange rate.
Sizing and placement considerations
Sizing a bathroom purifier starts with understanding the space. Look for models specifically rated for small-to-medium bathrooms and ensure the unit’s filtration configuration is capable of handling the types of pollutants common in a damp environment—particles, odors, and moisture-associated compounds. Placement matters: put the purifier where air can circulate freely, away from direct water spray and heat sources, ideally on a stable surface like a vanity or shelf with some clearance to allow air to move. Avoid placing purifiers on carpets or behind towels where airflow is restricted. If your bathroom is unusually small or rarely vented, you may benefit from a compact unit with a modest footprint that fits on the counter or wall-mounted option. Regularly rotate position if you notice stagnant air in certain corners.
Essential features to look for
When selecting a bathroom purifier, prioritize features that address the moisture-rich bathroom environment. Look for a true HEPA filter to capture fine particles, an activated carbon filter to neutralize odors, and a sealed, moisture-resistant housing. A washable pre-filter can extend the life of the main filter, while a robust enclosure protects internal components from humidity. Favor models with an auto or humidity-sensing mode so the fan adjusts as moisture levels rise and fall, which helps maintain comfort between uses. A simple filter life indicator and easy replacement process reduce maintenance friction. Finally, confirm the unit is certified as ozone-free and has a compact, splash-resistant design suitable for bathrooms.
How to maintain and replace filters
Maintenance is the key to consistent performance in a bathroom purifier. Start by powering off and unplugging the unit before opening the housing. Remove old filters and wipe down the interior with a soft, damp cloth to remove dust. Install new filters following the correct orientation—filters are designed to fit only one way. Replace any pre-filters if applicable, and reseal the housing securely. Reset the filter-life indicator if your model provides one. Regular maintenance minimizes odor persistence and preserves airflow. Keep spare filters on hand to avoid downtime during replacements.
Energy use, noise, and cost of ownership
Bathroom purifiers vary in energy use and noise, especially when operating on high or in auto modes. Look for models with energy-saving features, such as auto-speed control and sleep or quiet modes, to minimize electricity usage and disruption. Noise level matters in bathrooms that are also used as dressing rooms or quiet study spaces; choose a unit with a low-noise profile if possible. Consider the long-term cost: replacement filters and any accessory parts will recur. Those costs should be weighed against the benefits of reduced odors and mold spores in a moisture-prone room. A well-chosen purifier often provides a favorable balance of upfront cost and ongoing maintenance.
Quick comparison: HEPA + carbon vs carbon-only in bathrooms
- HEPA + carbon: Better at trapping small particles and neutralizing odors; higher upfront cost but broader protection in moisture-rich spaces.
- Carbon-only: Strong odor control but limited particle capture; easier maintenance and often lower price.
- Your choice depends on room usage, humidity, and sensitivity to odors or allergens; for most bathrooms, a model with both filtration stages offers the best overall performance.
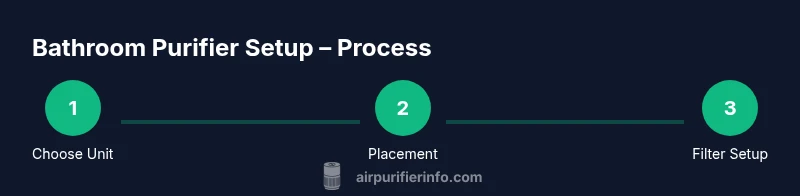
Quick-start setup checklist
- Choose a bathroom-rated purifier with carbon and HEPA filtration.
- Place the unit where air can circulate, away from water spray and heat.
- Install filters correctly and verify the unit starts up without unusual noises.
- Enable auto or humidity-responsive mode to match moisture levels.
- Set reminders to check filters and clean the housing every few weeks.
Real-world setup tips and scenarios
In rentals with limited space, a compact purifier on the vanity often suffices, but ensure it doesn’t block the doorway or vent. If you have a larger family bathroom, a dual-unit setup placed at opposite ends can improve air turnover. Always read the manufacturer’s directions for humidity ratings and water exposure warnings to protect the device and maintain performance.
Tools & Materials
- Bathroom-safe air purifier (rated for humid environments)(Ozone-free, sealed housing)
- Replacement filters (compatible with purifier)(One filter and pre-filter if applicable)
- GFCI-protected bathroom outlet(Safety first; avoid using extension cords near water)
- Screwdriver or mounting hardware (optional)(If you plan to mount the unit on a wall)
- Soft cloth and mild cleaner(For routine exterior cleaning)
- Reminders or timer(Set maintenance alerts (monthly or per filter life))
Steps
Estimated time: 45-60 minutes
- 1
Unpack and inspect the purifier
Open the packaging and verify that the unit, filters, and any accessories are present. Check the filter for damage and ensure the correct model is included. If a pre-filter is supplied, confirm it is attached properly.
Tip: Inspect seals and doors; a loose seal reduces efficiency. - 2
Choose a safe placement
Identify a stable surface away from direct water spray, heat, or steam, but where airflow can circulate. Place on a vanity or shelf with room for the air to move around the unit.
Tip: Avoid placing on carpets or behind heavy towels that restrict airflow. - 3
Install or replace the filter
If this is a new unit, install the filter following the manual. If replacing, remove the old filter, wipe the housing, and insert the new filter in the correct orientation. Ensure a snug seal.
Tip: Finger-tight is usually sufficient; over-tightening can damage seals. - 4
Plug in and configure settings
Connect to power and select an appropriate mode. If available, enable auto or humidity-sensing mode so the purifier adapts to rising moisture. Keep the unit in its lowest setting when the room is unoccupied to reduce noise.
Tip: Avoid running on high continuously to minimize energy use. - 5
Run a test and verify airflow
Turn on the purifier and confirm air exits from the vents smoothly. Listen for unusual noises and check that there is no vibration or movement of the unit.
Tip: If air feels stagnant, re-check filter seating and adjust placement. - 6
Schedule maintenance
Create a reminder to inspect and replace filters on schedule. Record the installation date so you know when replacements are due.
Tip: Storing spare filters nearby reduces downtime during changes.
Questions & Answers
Do I really need a bathroom air purifier?
For many bathrooms, particularly damp or small spaces, a purifier reduces odors, dust, and mold spores. It should complement ventilation, not replace it.
If your bathroom often smells or feels damp, a purifier can help, but it’s best used with good ventilation.
What size should I get for a small bathroom?
Choose a model labeled for small-to-medium bathrooms and ensure it has filtration capable of handling typical bathroom pollutants. Avoid oversized units in tiny spaces.
Pick a compact purifier designed for small bathrooms and check that the filters match bathroom pollutants.
Is it safe to use a purifier near the shower?
Keep the purifier away from direct water spray and ensure the enclosure is moisture-rated. Use GFCI outlets and avoid cords over water sources.
Don’t place it in the direct spray zone; select a moisture-rated unit and keep cords dry.
How often should filters be replaced?
Replacement timing depends on usage and environment. Check the unit’s indicator and follow the manufacturer’s schedule for carbon and HEPA filters.
Watch the indicator and replace filters as recommended by the manufacturer.
Can a bathroom purifier remove humidity?
Purifiers remove particles and odors, not humidity. Use proper ventilation or a dehumidifier if humidity is consistently high.
Purifiers don’t dehumidify; use ventilation or a dedicated dehumidifier for moisture control.
Are there safety concerns using purifiers in bathrooms?
Choose units with moisture-rated housings, avoid extension cords, and keep outlets GFCI-protected. Regular cleaning prevents mold buildup on the unit itself.
Yes—prioritize bathroom-rated, moisture-safe models and keep electrical outlets protected.
Watch Video
Main Points
- Select bathroom-rated purifiers with HEPA and carbon filters.
- Place units for optimal airflow, away from water spray.
- Schedule regular filter replacements to maintain performance.
- Combine purification with ventilation for best results.