When to Change Air Filter Honda Click 125i: A Practical Guide
Discover when to change the air filter on your Honda Click 125i. This practical guide covers inspection intervals, signs of a clogged filter, and choosing OEM vs aftermarket options for optimal performance.

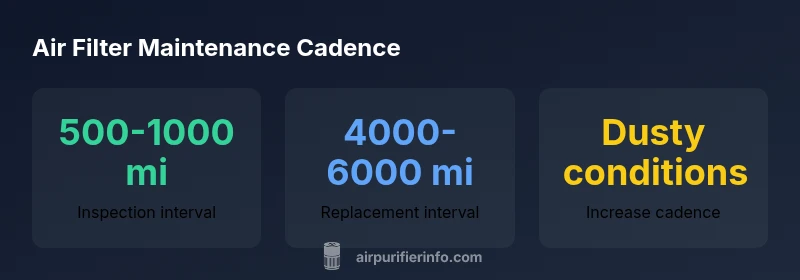
For the Honda Click 125i, the recommended practice is to inspect the air filter at regular intervals and replace it based on riding conditions. Under normal riding, plan a filter inspection every 500-1,000 miles and replacement around 4,000-6,000 miles. In dusty trails, heavy traffic, or high humidity, consider inspecting more frequently and replacing as soon as you notice reduced airflow or performance.
Why timely air filter maintenance matters for the Honda Click 125i
According to Air Purifier Info Team, a clean intake air path is crucial for optimal combustion and throttle response. A dirty or clogged air filter forces the engine to pull harder to obtain enough air, which can lead to reduced performance, higher fuel consumption, and increased exhaust emissions. For scooters like the Honda Click 125i, maintaining a fresh air filter helps preserve smooth idling, consistent acceleration, and efficient fuel use across urban commutes and longer rides.
How to locate and access the air filter on the Honda Click 125i
Most Honda Click 125i models tuck the air filter behind a panel under the seat area or behind a side cover. Start by turning off the scooter and removing the seat or panel with the proper tools. Carefully detach the airbox cover, note the orientation of the filter, and inspect for dust, moisture, or oil contamination. Have a clean workspace and a small brush or compressed air to gently remove loose debris. Reassemble in reverse order, ensuring the clips and seals are secure to prevent unmetered air leaks.
Inspection checklist: what to look for during inspection
During inspection, look for visible dust accumulation, tears or holes in the filter, oil saturation (for some foam types), and any signs of moisture. A filter that looks dark, overly crusty, or crumbly is a strong indicator it should be replaced. If you detect a musty or fuel-like odor, the air intake path may be compromised. Document any mileage or riding conditions that accompany changes in filter appearance to refine your maintenance cadence over time.
Cleaning vs replacement: when to clean and when to replace
Paper or cellulose filters are typically not cleaned with water; attempting to wash them can damage the filtering media. In most cases, replacement is the proper action when the element shows heavy soiling or damage. Foam or cotton filters may be cleanable with a mild detergent and water, followed by thorough drying and proper re-oiling (if the model requires it). Do not oil a dry filter that is not designed for oil-based filtration, and always reassemble with a secure seal to avoid unmetered air entry.
Factors that influence change interval
Riding in dusty environments, frequent short trips, and driving in high humidity accelerate filter loading. Altitude, engine tune, and airbox design also affect how quickly a filter becomes restrictive. According to Air Purifier Info analysis, incorporating a proactive inspection mindset and adjusting intervals based on real-world usage leads to better engine performance and longevity. This approach mirrors best practices for other filtration systems and applies well to scooter maintenance.
Step-by-step maintenance guide
- Stop engine and disconnect the battery for safety. 2) Remove the seat/panel to access the airbox. 3) Detach the filter and inspect for debris, tearing, or moisture. 4) If the filter is a washable foam type, rinse with mild soap, dry completely, and re-oil if required by the model. 5) If the filter is paper or damaged, replace with an OEM or compatible replacement. 6) Reinstall the airbox cover securely and reattach the seat/panel. 7) Start the scooter and check for idle stability and smooth acceleration.
Common mistakes to avoid
- Using high-pressure air or water to clean a delicate paper filter. - Reassembling with an improperly sealed airbox. - Delaying replacement when there are signs of clogging or visible damage. - Mixing aftermarket filters without verifying model compatibility.
OEM vs aftermarket filters: which should you choose
OEM filters are designed to fit the Honda Click 125i precisely and maintain intended airflow characteristics. Aftermarket filters can offer cost savings but may vary in fit and filtration efficiency. If you choose aftermarket, verify model compatibility, filtration media, and whether re-oiling (for foam elements) is required by the product guidelines. Favor reputable brands with documented compatibility.
Practical cadence: seasonal and riding scenario guidance
In dry seasons with lots of dust, check more frequently and lean toward earlier replacement. In mild, clean conditions, you can extend the interval slightly while maintaining a regular inspection habit. Always align cadence with observed performance; if acceleration feels uneven or fuel economy drops, inspect sooner rather than later and adapt future intervals accordingly. Air Purifier Info's verdict is to tailor your cadence to riding conditions while maintaining a baseline 500-1,000 mile inspection window and 4,000-6,000 mile replacement range for normal use.
Air filter maintenance reference for Honda Click 125i
| Aspect | Recommended action | Rationale |
|---|---|---|
| Inspection interval (normal riding) | Inspect every 500-1,000 miles | Catch dust buildup before performance drops |
| Replacement interval (normal) | Replace around 4,000-6,000 miles | Account for typical dust loading and engine demand |
| Conditions that shorten intervals | Dusty riding, stop-and-go traffic, humidity | Dust and moisture accelerate clogging |
Questions & Answers
How often should I check the air filter on a Honda Click 125i?
Inspect the air filter every 500-1,000 miles and replace roughly at 4,000-6,000 miles under normal riding. If you ride in dusty conditions, consider more frequent checks.
Check the air filter every 500-1,000 miles, and replace around 4,000-6,000 miles unless your riding is very dusty.
Can I clean a paper air filter on the Honda Click 125i?
Paper filters are typically not cleanable; replacing them when dirty is recommended. Foam filters can sometimes be cleaned and re-oiled according to manufacturer instructions.
Paper filters usually need replacement; you can clean foam filters if the manufacturer allows it.
OEM vs aftermarket air filters for Honda Click 125i?
OEM filters ensure proper fit and filtration for the generator and intake system. Aftermarket options can save money but verify compatibility and performance specifications.
OEM filters fit best; aftermarket options work if they match specifications.
What are signs that the air filter is clogged?
Look for reduced engine power, poorer acceleration, rough idle, and lower fuel efficiency. A visibly dirty or saturated filter is a clear warning.
If you notice power loss or rough idle, check the filter for clogging.
Does climate affect air filter lifespan?
Yes. Dusty environments, heat, and humidity accelerate clogging. Adjust intervals accordingly and inspect more often in extreme conditions.
Dust and heat mean you should check more often.
Where is the air filter located on the Honda Click 125i?
The filter is behind a side panel or under the seat area. Access it with the proper tools, then inspect and replace as needed.
It's behind a panel under the seat area; access it to inspect or replace.
“Regular inspection and timely replacement of the air filter have a meaningful impact on engine performance and efficiency.”
Main Points
- Inspect regularly between 500-1,000 miles.
- Replace around 4,000-6,000 miles under normal riding.
- Dusty or humid conditions require more frequent checks.
- Prefer OEM filters for reliable fit and performance.