Can You Clean Air Purifier Filters Instead of Replacing? A Practical Guide
Learn whether you can clean air purifier filters instead of replacing, which filters are washable, safe methods, and when replacement is the right move for better indoor air quality.

According to Air Purifier Info, yes—but with caveats. Many washable pre-filters and some non-washable filters can be cleaned instead of replaced, extending life and saving money. Always check the user manual and follow the purifier’s approved cleaning method. Do not wash HEPA filters unless the manufacturer specifies it, and avoid damaging seals or media. When in doubt, replace per guidance.
Can you clean air purifier filters instead of replacing? This is a common question for homeowners trying to extend filter life and reduce costs. The short answer is: sometimes yes, but only when the filter is labeled washable and the purifier's manufacturer permits cleaning. Otherwise, cleaning can damage the media, seal, or airflow performance. According to Air Purifier Info, the right approach balances practical maintenance with warranty considerations. In practice, you’ll evaluate filter type, buildup level, and the purifier’s cleaning guidelines before deciding to clean or replace. This article provides a decision framework to empower you to maintain indoor air quality without unnecessary replacements.
Filter types and cleaning eligibility. Not all filters are created equal when it comes to cleaning. Washable pre-filters are designed to capture large dust and hair particles and are often the simplest to clean. Activated carbon or other odor-absorbing media, while sometimes refreshed, typically require replacement rather than cleaning because cleaning won’t restore adsorption capacity. True HEPA filters generally aren’t wash-friendly; cleaning can damage the delicate fiber media and reduce efficiency. Always review the purifier’s manual for exact guidance and look for explicit statements about washable vs. non-washable media. If a filter has a label that says washable, you can proceed with approved cleaning methods; otherwise, treat it as a replace-only component. Regular checks help you avoid assuming a filter is clean when it’s not.
Safety groundwork before cleaning. Before touching any internal parts, unplug the unit and remove the filter housing cover. Wear a mask and gloves if you have sensitive airways or a dusty environment. Keep the work area well-ventilated and avoid moisture near electrical connections. Do not use heat sources or harsh chemicals, and never attempt to clean a filter that is still installed in the purifier. Following these safety steps minimizes dust dispersion and protects the purifier’s electronics and seals.
Cleaning washable pre-filters: method and best practices. Start by removing the washable pre-filter from the housing. Gently brush away loose dust with a soft brush, then rinse under lukewarm running water. If soap is recommended by the manufacturer, use a mild, fragrance-free detergent and rinse thoroughly. Avoid twisting or wringing; instead, press out excess water and lay the filter on a clean towel to air dry completely. Never return a damp filter to the unit, as moisture can promote mold growth and damage the electronics.
Carbon filters: odor control and replacement. Activated carbon filters or odor-trapping media often cannot be effectively cleaned without compromising adsorption sites. If your manual allows light surface cleaning, use a gentle vacuum or brush to remove loose particles, but do not saturate or wash the carbon media. In most cases, replacement is the safer option to maintain odor control and performance. If replacement is required, follow the purifier’s steps for safely removing and installing the new carbon filter to avoid bypass leaks.
HEPA filters: when cleaning isn’t advisable. HEPA media is designed to trap extremely small particles; aggressive cleaning or washing can rupture the delicate fibers and reduce filtration efficiency. Some models permit surface vacuuming of accessible surfaces, but do not wash the pleated medium. If you observe visible discoloration, strong odors, or a drop in airflow, replacement is typically the recommended course. Always consult the manufacturer’s guidance before attempting any cleaning on HEPA components.
How to test and dry filters after cleaning. After cleaning, reassemble only fully dry filters and ensure there is no trapped moisture in the frame. Reinstall following the purifier’s instructions and run the unit on a low setting to check for unusual noises or airflow resistance. If you notice reduced performance after cleaning, re-check the filter seating, seals, and air intake paths. Maintain a dry environment to prevent mold growth inside the housing.
Creating a maintenance plan that includes cleaning. Build a routine that aligns with your air quality needs and the purifier model. Schedule light inspections monthly, deep-clean pre-filters every 2–3 months, and replace non-washable media according to the manufacturer’s timeline. Keep a log of when you cleaned or replaced each filter so you can spot patterns and adjust as needed. A consistent plan helps sustain indoor air quality without unnecessary expenditures.
Manufacturer guidelines and warranty considerations. Always follow the manual because some brands expressly prohibit washing certain media and void warranties if improper cleaning is performed. If you’re unsure, contact customer support for model-specific instructions. Documentation of approved cleaning steps can be helpful should you need to file a warranty claim.
Practical examples and decision guide. Scenario A: You notice dust accumulation on a washable pre-filter. Clean and dry it thoroughly, then monitor airflow for a few days. Scenario B: Your carbon filter emits a noticeable odor after cleaning or shows degraded performance; replacement is advised. In all cases, prioritize the manufacturer’s guidance and your unit’s safety to protect your indoor air quality.
Tools & Materials
- Soft brush or toothbrush(For lifting dust from fins and crevices)
- Mild dish soap or detergent(Use fragrance-free, gentle formula)
- Water (lukewarm)(For rinsing filters; avoid hot water)
- Microfiber cloth(For drying and wiping surfaces)
- Vacuum with brush attachment (optional)(Gentle suction for loose dust)
- Spray bottle (optional)(For even soap distribution)
- Gloves and mask(Protection when handling dusty filters)
- Drying rack or clean towel(Ensure complete drying before reinstallation)
- Replacement filters (as needed)(Keep on hand for non-washable media)
- Owner's manual(Model-specific guidelines must be followed)
Steps
Estimated time: 60-90 minutes
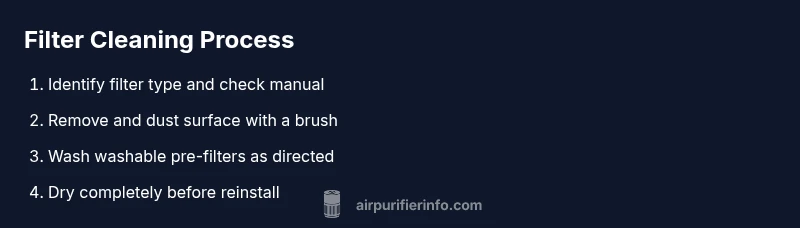
- 1
Power down and unplug the purifier
Turn off the unit and unplug from the wall to ensure no electrical current reaches internal components.
Tip: This prevents shocks and protects sensitive electronics. - 2
Remove accessible filters from the housing
Carefully take out the filters you can access without dismantling the purifier’s core. Keep track of order to reinstall correctly.
Tip: Take photos before removal to aid reassembly if unsure. - 3
Inspect filter types against the manual
Check whether the filter is labeled washable or non-washable. This determines your cleaning method and whether replacement is required.
Tip: If in doubt, treat as non-washable and plan for replacement. - 4
Dust off with a soft brush
Gently remove loose dust from surfaces using a brush to minimize moisture exposure to the media.
Tip: Avoid aggressive brushing that can tear media. - 5
Wash washable pre-filters (if allowed)
Rinse under lukewarm water, optionally using mild soap. Rinse until clear and avoid wringing.
Tip: Never soak carbon media or HEPA folds. - 6
Dry filters completely before reinstall
Place filters on a dry rack or clean towel and let them air dry fully in a well-ventilated area.
Tip: Do not hurry drying with heat sources; moisture invites mold. - 7
Reinstall filters in correct order
Place each filter back into its slot as originally arranged. Ensure seals are seated and no gaps exist.
Tip: A loose seal reduces efficiency and can bypass dirty air. - 8
Test the purifier after reassembly
Plug the unit back in and run on a low setting briefly to verify airflow and absence of unusual sounds.
Tip: If airflow is weak, reseat filters or inspect for damage.
Questions & Answers
Is it safe to clean HEPA filters?
In most cases, HEPA filters should not be washed; surface cleaning with a vacuum may be allowed on some models, but washing can damage the media. Always follow the manufacturer’s instructions and replace if required.
HEPA filters usually shouldn’t be washed. If cleaning is allowed, do only surface vacuuming per the manual and replace if in doubt.
Can I clean activated carbon filters?
Activated carbon filters are primarily for odor absorption and are not effectively restored by washing. Replacement is typically recommended to maintain odor control and adsorption capacity.
Activated carbon filters are usually replaced rather than cleaned to maintain odor control.
How do I know if a filter is washable?
Check the user manual or product label for 'washable' or 'reusable'. If no explicit guidance exists, treat it as non-washable.
Look for washable labels in the manual; if not clearly labeled, don’t wash.
Will cleaning void my warranty?
Many manufacturers allow standard cleaning if done exactly as described in the manual. Improper cleaning or using non-approved methods can void warranties.
Follow the manual exactly; improper cleaning can void the warranty.
What should I do if the filter looks moldy after cleaning?
If you see mold or persistent odor after cleaning, replace the affected filter and clean the housing. Do not reuse moldy media, as it will recontaminate the air.
Mold means replace the filter and clean the housing; don’t reuse it.
How often should I clean or replace filters?
Frequency depends on usage and environment. Inspect monthly and follow the manufacturer’s replacement schedule for non-washable media; wash washable pre-filters as needed.
Check your manual and inspect monthly to keep performance up.
Watch Video
Main Points
- Identify washable vs non-washable media before cleaning
- Dry filters thoroughly to prevent mold and damage
- Follow manufacturer guidance to protect warranty
- Replace non-washable media when required by the manual
- Maintain a regular cleaning/ replacement schedule