aer1 Error Code Troubleshooting Guide
Urgent, step-by-step guide to diagnose and fix aer1 error code on air purifiers, with quick fixes, a diagnostic flow, and professional help guidance.

aer1 is a diagnostic error code that signals a sensor or communication fault within your air purifier. It commonly appears when the device cannot read current air quality reliably, which can cause false readings or unexpected shutdowns. In many cases, a simple reboot or reseating internal connectors resolves the issue quickly; however, persistence may require deeper checks and potential professional assistance. Avoid using the purifier until the code is resolved to prevent further sensor confusion.
What aer1 Means
According to Air Purifier Info, aer1 is a diagnostic error code that signals a sensor or communication fault within your air purifier. It commonly appears when the device cannot read current air quality reliably, which can cause false readings or unexpected shutdowns. In many cases, a simple reboot or reseating internal connectors resolves the issue quickly; however, persistence may require deeper checks and potential professional assistance. The goal is to restore accurate air-quality data and normal operation, so you can protect your home's dust, odors, and allergen control. Throughout this article, aer1 will refer to the error code you see on your purifier’s display, and we’ll use practical steps homeowners and renters can follow. Air Purifier Info’s analysis shows that most aer1 incidents stem from sensor connection issues or filter seating, rather than a full controller failure. By addressing these basics first, you can often avoid costly repairs and downtime. Keep in mind that every purifier model handles sensors a bit differently, so consult your manual for model-specific steps if available.
Symptoms and User Impact
When aer1 appears, you may notice the display flicker, inconsistent PM readings, or the unit refusing to run despite power. Some models show aer1 and then immediately restart; others freeze on the error and won't clear without a reset. The impact goes beyond annoyance: inaccurate air-quality data can tempt you to run the purifier longer than necessary or skip maintenance tasks that matter, such as filter replacement. If you have pets, allergies, or household dust, resolving aer1 promptly reduces exposure and helps maintain indoor air quality. In an apartment or open-plan home, the difference can be immediate—better comfort, fewer triggers for sneezing, and clearer breathing for sensitive occupants. The Air Purifier Info team notes that quick action minimizes downtime and preserves the purifier’s lifespan, especially when you’re relying on it to manage daily odors, smoke, or cooking residues. Remember, aer1 is a signal that something in the sensing chain needs attention; not a fatal device fault, but a cue to check the basics first.
Causes and Urgency by Likelihood
- High likelihood: Loose or dirty sensor connectors; dirty sensor housing; incorrect filter seating. These are the most common causes that trigger aer1 and are usually quick to verify.
- Medium likelihood: Firmware glitches; partial power fluctuation; minor PCB lint accumulate over time.
- Low likelihood: Dust around external ports; temporary heat variation or rare manufacturing tolerances.
Quick Fixes You Can Try Now
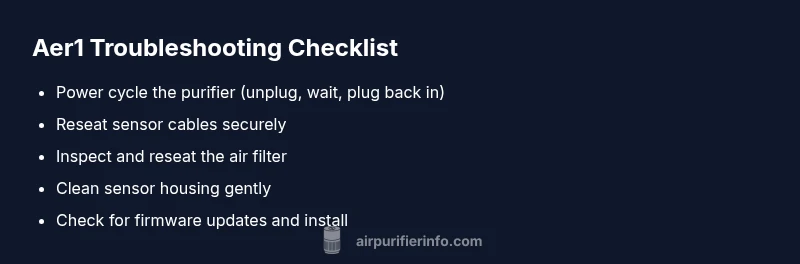
- Power cycle the purifier: unplug, wait 30 seconds, plug back in, and observe if aer1 clears. 2) Reseat sensor cables if accessible; ensure they click firmly into their sockets. 3) Inspect the filter seating; remove and reinstall if necessary and ensure the seal is intact. 4) Clean the sensor housing area with a soft, dry cloth; avoid liquids near electronics. 5) Check for firmware updates via the purifier’s app or onboard menu and install if available. 6) Run any built-in self-test or diagnostic mode to verify sensor health.
Step-by-Step Repair for the Most Common Cause: Loose Sensor Connectors
- Unplug the purifier and place it on a stable surface. 2. Remove the access panel or back cover following your model’s instructions. 3. Locate the sensor connectors near the air inlet or control board. 4. Gently unplug and re-seat each connector, ensuring a firm click. 5. Reassemble the housing, plug in, and power on. 6. Run a test cycle to confirm aer1 is cleared and readings are stable.
Other Causes and How to Address Them
Dust buildup around the exterior or intake ports can affect sensor readings. Clean the exterior with a dry cloth and vacuum if your purifier’s design allows. Firmware glitches can be resolved with updates—check the app or manual. If a sensor has failed or a control-board issue is suspected, professional diagnosis may be required to avoid further damage.
Safety Reminders and When to Call a Professional
Always unplug before opening your purifier. Avoid using liquids inside the unit and never force connectors. If aer1 persists after all quick fixes and step-by-step checks, contact the manufacturer support or a qualified appliance technician to prevent electrical hazards or irreversible sensor damage.
Maintenance and Prevention: Keeping Aer1 at Bay
Schedule regular filter replacements according to the model’s guidelines and keep sensor areas clean. Periodically update firmware to minimize glitches. Position the purifier away from strong heat sources and humidity that can affect electronics. Regular internal checks by a technician during annual service can significantly reduce aer1 occurrences.
Steps
Estimated time: 15-30 minutes
- 1
Power down and unplug
Shut off the purifier and unplug from the wall. Wait at least 30 seconds to discharge residual power before opening the housing.
Tip: Use a dry microfiber cloth to wipe the exterior before you start; keep the workspace dust-free. - 2
Access sensor area
Remove the back panel or access door per your model’s manual. Locate the sensor connectors near the control board.
Tip: Take a photo of connector layouts before disconnecting anything to aid reassembly. - 3
Reconnect sensor cables
Gently unplug and re-seat each sensor connector until you hear a click. Ensure no pins are bent and wires are properly aligned.
Tip: Handle with dry hands; avoid pulling cables by the wires, only by the connectors. - 4
Check the filter and seal
Remove the filter, inspect for clogs, and reseat securely. Ensure the gasket or seal sits evenly around the filter housing.
Tip: If the filter looks overly dirty, replace it instead of cleaning, following manufacturer recommendations. - 5
Reassemble and test
Replace the cover, plug in, and power on. Run a quick diagnostic or self-test to verify aer1 is cleared and the readings stabilize.
Tip: Record the diagnostic results; if aer1 reappears, proceed to professional support.
Diagnosis: Aer1 code appears on display and device shows abnormal sensor readings
Possible Causes
- highLoose or dirty sensor connectors
- highDirty sensor housing or obstructed airflow
- highFilter seating issues causing sensor misreadings
- mediumFirmware glitch or partial power fluctuation
- lowSensor or PCB hardware degradation
Fixes
- easyPower cycle and reseat sensor cables
- easyInspect and reseat the filter and ensure proper seal
- easyUpdate firmware if available and re-run self-test
- easyCheck power supply stability and perform a clean power reset
- hardIf persistent, contact support for diagnostics or part replacement
Questions & Answers
What does aer1 mean on my air purifier?
aer1 signals a sensor or communication fault affecting air-quality readings. It’s usually fixable with basic checks and updates, but may require service if persistent.
aer1 means there's a sensor or communication fault affecting readings. Start with simple resets and checks, and contact support if it keeps showing up.
Can I fix aer1 myself?
Yes in many cases you can fix aer1 at home by rebooting, reseating cables, and reseating the filter; if the issue remains, refer to the manual or seek support.
Yes—start with a power cycle, then check cables and the filter. If it continues, contact support.
Is aer1 a safety risk?
Aer1 is typically not a direct safety hazard, but it indicates sensor problems that can lead to inaccurate readings and reduced filtration performance until resolved.
It’s not usually dangerous, but it can mean your purifier isn’t reading air quality correctly, so fix it promptly.
Will a firmware update fix aer1?
Sometimes, yes. If a firmware glitch is causing the sensor miscommunication, updating the firmware can resolve aer1.
A firmware update can fix aer1 if the issue is a software glitch. Check for updates in the app or device menu.
When should I replace sensors or parts?
Replace only if diagnostics indicate a failed sensor or PCB component; many aer1 incidents resolve with resets without hardware replacement.
Only replace if diagnostic tests show a failed component; otherwise, resets and updates usually suffice.
When is professional help necessary?
If aer1 persists after all basic fixes and firmware updates, or you notice hardware damage, contact a qualified appliance technician or the manufacturer’s support line.
If it keeps coming back after basic fixes, it’s time to get professional help.
Watch Video
Main Points
- Identify aer1 as a sensor/communication fault
- Try quick fixes first: power cycle, reseat cables, reseat filter
- Update firmware and run self-test when available
- Call a professional if aer1 persists after fixes